iOS configuration
APN configuration provides access to the Internet or optionally provides access to MMS or WAP.
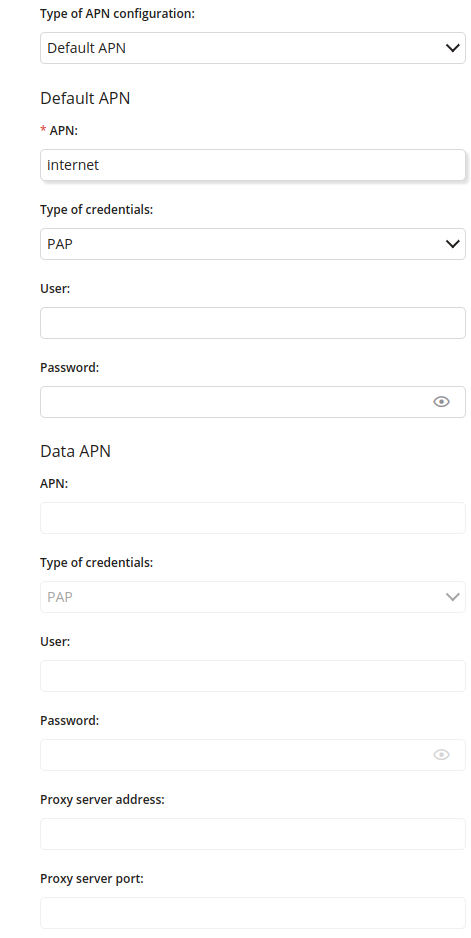
1 Type of APN configuration
- Choose a type of APN configuration
- One of:
- Default APN
- Data APN
- Default APN and Data APN
2 Default APN – APN
- Enter the Default APN Access Point Name
- Maximum length of the text is 255
- Required if “Default APN” or “Default APN and Data APN” is chosen
3 Default APN – Type of credentials
- One of:
- PAP
- CHAP
4 Default APN – User
- Enter the Default APN username
- Maximum length of the text is 255
5 Default APN – Password
- Enter the Default APN user password
- Maximum length of the text is 255
6 Data APN – APN
- Enter the Data APN Access Point Name
- Maximum length of the text is 255
- Required if type of APN configuration is “Data APN” or “Default APN and Data APN”
7 Data APN – Type of credentials
- One of:
- PAP
- CHAP
- Available if “Default APN” or “Default APN and Data APN” is chosen
8 Data APN – User
- Enter the Data APN username
- Maximum length of the text is 255
- Available if “Default APN” or “Default APN and Data APN” is chosen
9 Data APN – Password
- Enter the Data APN user password
- Maximum length of the text is 255
- Available if “Default APN” or “Default APN and Data APN” is chosen
10 Proxy server address
- Enter the proxy server address
- Maximum length of the text is 255
- Available if “Default APN” or “Default APN and Data APN” is chosen
11 Proxy server port
- Enter the proxy server port
- Maximum value is 65535
- Available if “Default APN” or “Default APN and Data APN” is chosen